Sunday, July 1, 2012

July Thrifty Decorating


Thrifty July Decorating by Shopping your House and Using Supplies on Hand:

First I had some stars in the flag theme that I was tired of. I spray painted some in aqua and I love it. Here is an aqua star on top of some vintage frogs in front of an old box:


I put some flags I had on hand in a vintage Bell jar, set out a candle I made years ago, and used things around my house to make a grouping of items in patriotic colors:


The star here was from a plant pole that broke off, so here it is decorating the front of my vintage cheese cloche with fake apples in it, and the plates were items I had on hand scored from thrift shops which are a silver plate, milglass plate, and a basket weave plant stand thingie:


Many of you know about the wreath above my piano. It gets a new center made every month with a magnet to change it out. The month of July I found a patriotic muffin cup I had on hand, and spray painted old broken jewelry I had on hand (the flower) to make this center:


Here is the piano mantel. I put out everything that I shopped my house with: two milkglass compote dishes and some white candles. Two vintage cheese cloches that had vintage clothes paper patterns cut up in them:


My milkglass collections got a bit of patriotic updates with ribbons, a flag sign, and a wood apple that I had on hand:


My vintage gumball machine had a blue star (from an old scout project) I unearthed from my box of scrips and scraps of junky fun stuff and I painted it blue and inserted it:


My apothecary station got a frame I dug out and painted it aqua blue. Added a flag, two red wood strawberries, and a scrapbook emphermera: a bingo card. The jars were left plain this month:


This is the major update. I took down a metal thingie I used to have there on the wall for years and put up a large chunky wood frame I scored from the thrift shop for $6. I painted it cream. I have plans to do fun stuff and decorate this wall for the next few months. This month for July I just added a book wreath I made with a patriotic themed center, the other two metal stars I painted aqua blue. I also painted a scrap piece of wood aqua blue, glued on a strip of canvas, then I traced on stars and painted them red and one blue star and hung it up on the wall: 


(tip for above: I use small nails and try to hang up lightweight items so I don't have obvious big holes on the wall from my frequent changing around decorations. Every 3 months I touch up the walls with paint that I keep in the kitchen pantry with a small brush ready to go)


The metal frame in the photo below used to be on the wall in the photo above. I found it a new home on this shelf above the foyer window. I just added a flag in the vintage sewing bobbin I have there:


I made a banner with leftover upholstery ribbon I had on hand. They just happen to be in the colors that match my house: canvas and burlap tan, and red. I made a star template and dabbed on some blue paint. Then I glued the starry squares onto twine, and hung in up in my foyer:


I made a mini banner with patriotic flag muffin cups I had on hand and hung it on a vintage wood window frame. The heart and star sign is a project I made 3 years ago. This is the bookcase mantel I have in the living room:


This old vintage candlestick got a makeover in aqua blue spray paint. Then I just put in two twine balls I had on hand in the candle holders:


The chalkboard that has been up in my kitchen for months got a new message: School is Out!


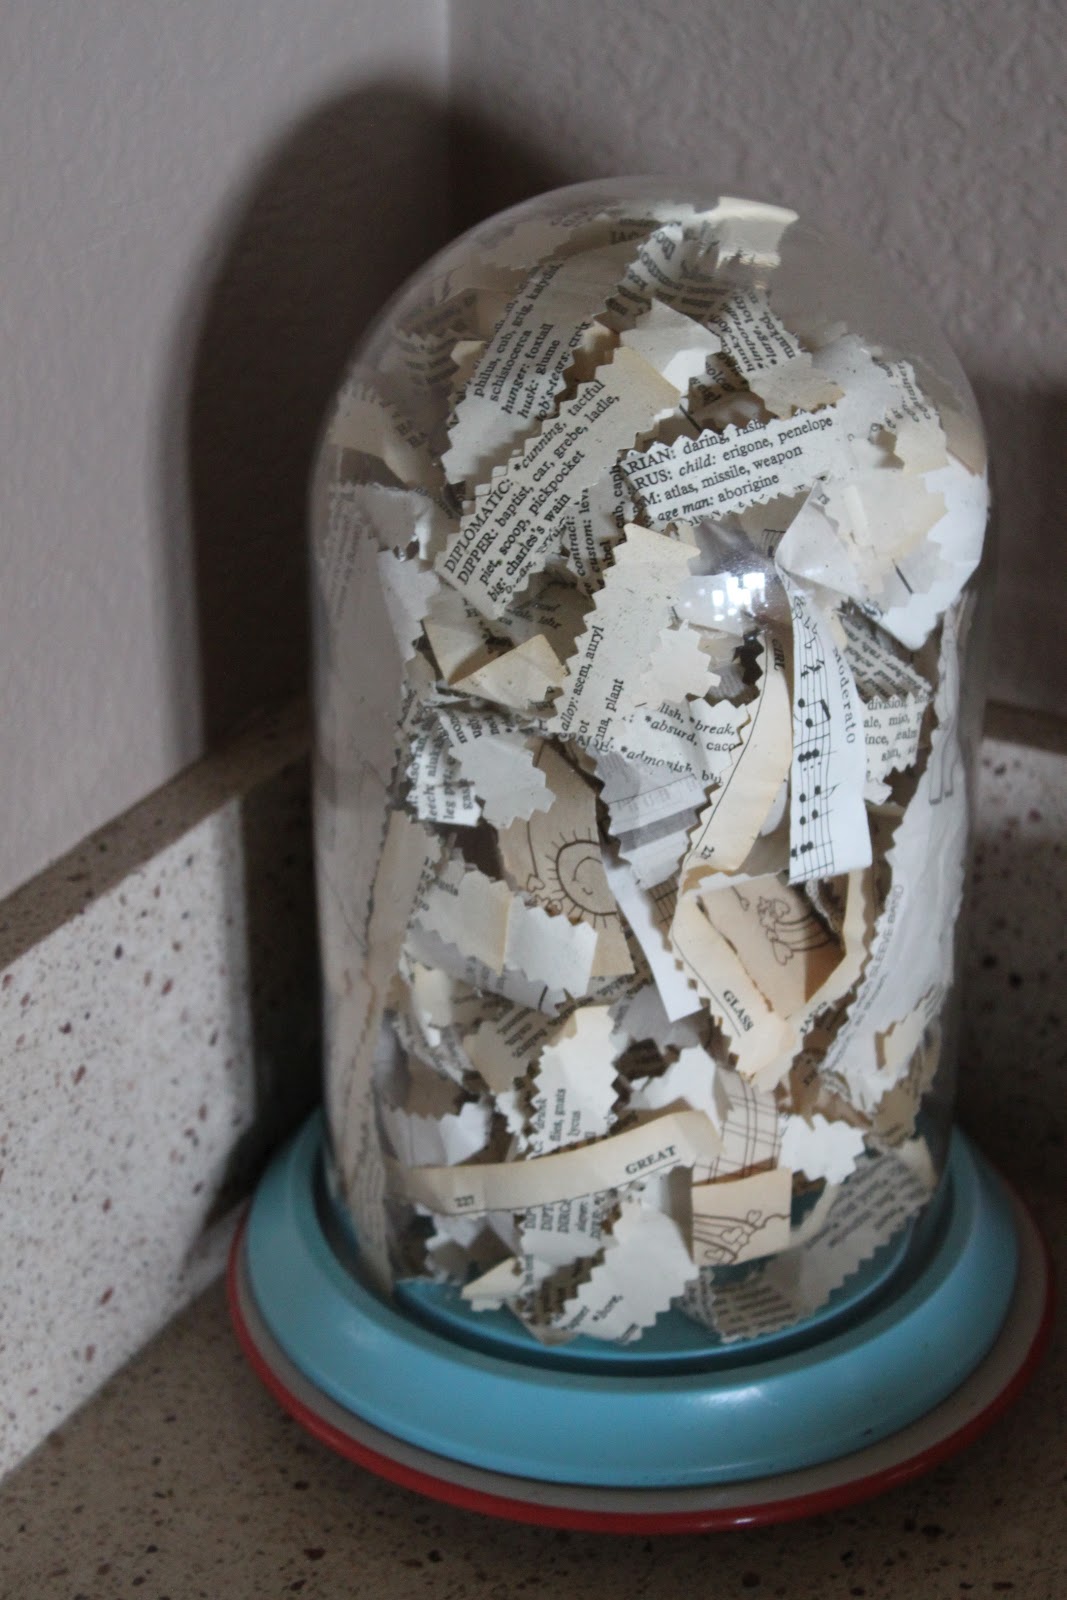
The vintage cheese domed cloche in my kitchen just got wadded up leftovers from my bookwreath projects. I like the look of the textures and colors. The wood plate end got spray painted in aqua, then I added a vintage red and white enamelware  plate I had on hand to complete the patriotic color theme:

This is a vintage embroidered tablecloth I found years ago. Its in red, white, and blue colors and perfect for displaying on my dining room window for a bit of patriotic colors and fun:


So that's it for July decorating. I keep it simple and shop my house for items, and update with a bit of spray paint or even a bit of fabric, scrapbook supplies, or ribbon. No need to spend money to decorate your house each month. I challenge you to try it sometime. :o)

Sunday, May 6, 2012

Makeover for a Triple Picture Frame

I like to decorate my house with items in which I can change items that are IN them.

Old Mason jars,  cloches from vintage cheese domes, and frames work well for this.

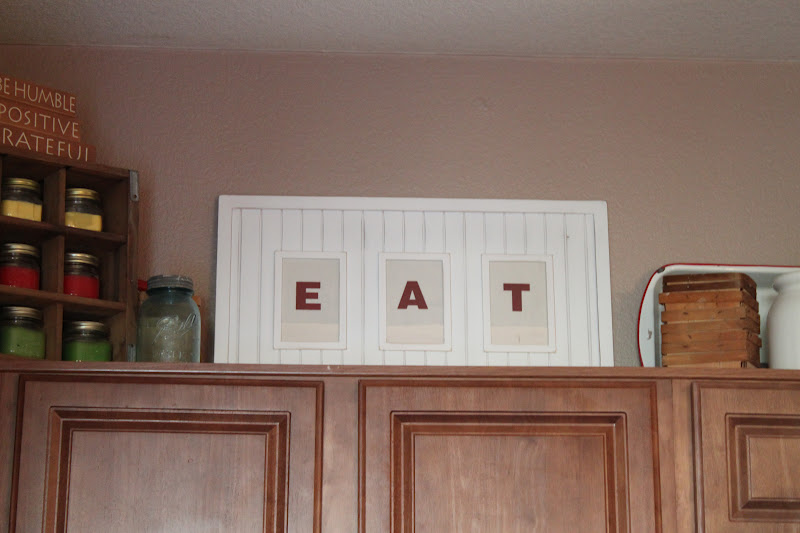
I had this triple picture frame from cutouts from vintage magazines up on my cabinets in my kitchen for the last three years and it was time for a makeover:


Here is the new update. I put mod podged leftover canvas onto thin backer cardboard that I save from each 12x12 cardstock pad that I buy. Burlap would also work well. Then I took some large cardstock sticker letters and spray painted them red, and glued  them on the three rectangles of canvas. Stenciling, Cricut letters or handpainting the letters would also work well. Here it is:


I really like how much better it looks. Then I had an awesome idea on how to change up the frame once in a while when the mood strikes.

How is this one for July and Independence Day coming this summer? I cut out a fabric red star from my fabric stash, and traced two stars on the canvas and painted it with some acrylic paint I had on hand. I used a template that I also had on hand:


I am going to make more. "BOO" for October. Fabric prints for August, or maybe watermelon prints. Looking for owl prints for Sept...ideas are growing now.

Cost: Free. Used items on hand.

Yippee for free and fun craft makeover projects!

Tuesday, April 10, 2012

Thrifty Easter Tablescape

I haven't decorated or set the table for Easter in several years.

For some reason I was in the mood to do so the previous Sunday:


I used a green tablecloth that I had for years. I put a leftover strip of burlap down the center.

The plates are from my Crazy Daisy Corella collection from thrift stores.

The milkglass vases were from thrift stores, and I added rosemary from my garden in the vases.

The mugs were also from thrift stores over the years. Each mug had a slice of orange and cold water.

Leah did the silverware and the napkins. I forgot to tell her that it should be on the right side of the plates, lol.

The two baskets are from a future project. I have about 10 of them. The two baskets on the table held the kids dyed Easter eggs from Saturday night, kept cold for dinner and nicely decorated the table.

The candlestick is a thrift store find a couple years ago. It has been spray painted in different colors about 4 different times. Currently is is a lovely aqua color. The candles were borrowed from my room to the table to add ambience.

Basically I shopped my house and looked around for items to use.

The kids and husband were slightly amused as this isn't really my thing. I am more likely to throw the silverware to the center of the table and tell them to help themselves to their eating untensils and food.

The Easter dinner of ham, funeral potatoes, brocolli, and fruit were set on the countertop as a buffet.

Friday, March 9, 2012

Christmas Decorations 2011

I know.

I am finally posting my Christmas decorating ideas online after promising friends months ago that I would do so.

So here it is:

I found this nativity scene at the thrift store a few years ago, and I love it. It was placed on the piano. It was clearly handmade, and looks like it could have been a Boy Scout project or something. Nativity scenes are usually pricey, so looking at thrift stores is a good place to start:


I don't really have a lot of Christmas decorations, so what works for me is to put your basic holly berrys, pinecones, and greenery in every container that I have. I collect vintage Ball jars and cheese dome (to use as cloches), and I am always putting something different in them every holiday season:


Just put pinecones on the candlesticks I already had from the thrift store and add greenery. It was pretty simple to decorate this armoire:


 I have these antique "frogs". They were used to brush horse hair. Many people collect them to display vintage postcards, emphmera, and pictures. I just break out my scrapbook items and look for a word to spell, then put the scrap embelly items away when I am done. For Christmas 2011 I spelled the word Joy:


I love hanging pinecones from my vintage window frame. The star is my old topper for the Christmas tree. I no longer have a tree, and have a "flat" fabric tree that I hung up for the last two years. I move the star around whenever I feel like it:


I love decorating my vintage 1940 Hoosier hutch. I just basically change what I put in the vintage Ball jars or vintage milkglass containers. I shop my house all the time and move things around. This is the first ro. Each Ball jar has  fake snow and silver glittery ornaments:


The second row has jars of candy canes, silver star ornaments hung from old hooks that formerly probably held tea cups. The center holds a vintage cloche that I got for $4 from the thrift store. They sell for $40 at antique stores. I spray painted the base red and put vintage ornaments inside with fake snow on the bottom:


The third row I tried to make like Santa's sweet shop with items I already had. The last and forth row at the time holds my gumball machines that I collected. They are made with real metal and glass. I sometimes put holiday candy inside them:


My favorite decoration is the candy dispenser machine I got a few years ago. It was decorated the same as last year:


I recently found another vintage scale in my favorite colors of red and white. I shopped my house and made this little decorative area for the corner of my kitchen. I added a bunch of glittery red stars around the house, and here is one place I put it:


I made a chalkboard for my preschool class. They used it one time and haven't used it since. Instead of storing it away to collect dust, I turned it into a wonderful decorative idea b¥ putting it on top of the cabinet and for it to be used each month by simply wiping off the chalk and create a new banner or message. This month is Santa's Cafe sign:


I had leftover stuff from a tree I no longer have so I used it to decorate the chandelier:


Here is my favorite that I have been doing the last 18 months: changing the theme of items in the jars. This month is pretty close to last year, Santa's Apothecary:


This bowl decorates the bottom shelf in the front foyer. I just added pine cones and leftover red bead decorations:

This holly berry wreath used to be my chandelier decoration each year. This year it was given new life and placed over a metal decorative element that sits in my foyer:


I have greenery I don't really care for, but instead of tossing it, it went into the vintage wood box that I have by the front door. I hoped to have a real plant on the plant stand, but never got around it it, so I have this old fake tree decoration that was placed on that instead:


Fake greenery in my plant pot by the front door:

 
And finally the Powell family tree, kindly referred as Flat Tree. I was remodeling and painting last year and our old fake tree finally passed away. Instead of buying another tree to get in the way, I made a flat tree. And the kids loved it, and requested it be the holiday tree every year from now on. I moved the Ikea bookcase shelf from this area to the kitchen and placed the tree on this wall. The red ribbon is hot glued on the green burlap tree. The lights is stapled on, and the star is stapled on. The ornaments go through the holes in the burlap. The tree beforehand got rubbed down with cloves spice powder, cinnamon spice powder and pine essential oil to make it smell Christmasy, and the kids enjoyed helping me with that:


I display the Santa bed candy dish every year. My mom had one when I was real little back in I think 1980, it was made by her sister (my aunt) with her ceramic mold, and it was my most favorite Christmas decoration ever as a kid. My aunt kept the mold over the years, and her daughter who is now my SIL made me one for Christmas sometime I think in 1999. I made one new thing for a Christmas decoration: I photoshopped a Santa's List and printed it out and added it to the clipboard I had for years:


Well, that's it. Not too much stuff because I don't want to take 3 months to take all my stuff down.

Little Critter Visits my Yard!


Recently I had spilled a lot of rice outside in the backyard. I was so ticked off about having to clean it up as so to not attract a lot of bugs that might eventually decide to move into my house.

Looks like I didn't have to do any cleaning up. These cute little birds are taking care of it for me.

And before you judge me on the fact that birds will explode from eating rice, check this out:

http://www.snopes.com/critters/crusader/birdrice.asp


Also my backyard has a regular visitor. If you get to see this cute chipmunk, then you are quite lucky. This little critter is spooked very easily and constantly checks its surroundings. All I have to do is very slowly put my hand on the window and it will still run off. Imagine my surprise when I got to open the SGD and take a picture. I think the wind covered up any noise I was making. This chipmunk comes between the hours of noon and 2 pm to eat up the tidbits that my preschoolers have dropped on the ground.


Thursday, October 6, 2011

Garden Surprises!

In the month of Sept we had a surprising week of wonderful "rain all day long and everyday" kind of rain. It led to wonderful surprises in my backyard garden.

First off are my pear trees that I planted in August. Most of the leaves fell off due to plant shock. But during the rains it bloomed all of sudden from the bare branches. They didn't last long due to the returning high temperatures the following week.  But it was still a nice surprise:


Then there were mushrooms popping up all over my gardens:


The small mini rosebush that disappeared under the mint plants, I thought it died away due to the scorching summer. The rains brought out new stalks and white roses peeking out above my peppermint plants. What a nice surprise:


The bougainvillea bush I had in the corner was nearly 5 feet high and 4 feet wide. Then the deep freeze in February nearly killed all of my plants in the backyard and killed the large tree in my front yard. The rains brought out tender new shoots from my bougainvillea bush! I left the rootball in the ground in hopes that it would grow and bloom again. It took 8 months for the rootball to heal, but here it is finally growing back:


Funny mushrooms sometimes starting merging together as they grew, into like one fat mushroom:


Also my lemon trees are coming back from the original trunk that was cut to the ground when it died in the February deep freeze. (not pictured) The one you see above is my grapefruit tree that survived.

My kids found a nice surprise hidden under the peppermint plants. They pushed them back and found 4 single mushrooms bigger than their hand! They are still there in the gardens:


My gardens are bringing tons of fat happy lizards everyday to a big feast. I rarely spray pesticides in my gardens so it turned into a major toad and lizard cafe in each raised garden bed. This lizard hitched a ride on my son back into the house:


And finally sometimes if we look beyond our gardens we will find an interesting cloud. This one was on a clear blue cloudless sky, except for this huge cloud merged from smaller clouds. My younger kids thought it was a tornado cloud:


September brought such nice surprises outside despite the lingering heat. What surprises have you found in your garden or backyard?