Wednesday, January 8, 2014

Tribute to 15 Year Old Cade on His Birthday

My son Cade was born into this world beat up, angry and screaming. After hours of a difficult and painful entrance, a nearly 10 pound boy was born blue. His first moments in life was spent being smacked, spanked, poked, and prodded while I was off to the side nearly passed out in pain.

Here is my son with a bruised and swollen face, it took days for his eyes to fully open from the bruising:


When I brought home this angry screaming baby, he always looked like this in most pictures, and in his daily life (Cade obviously on the right):


It was a nightmare that dragged on for months, and months, and months. He screamed and screamed and screamed and cried all day long. EVERY SINGLE DAY. And every night I would cry, and cry, and cry, and pray, and pray and pray for the strength to get through another day.

When Cade got a few months older, NO ONE could hold baby Cade. He would not in any way allow anyone to hold him or his screams got worse. They were so bad and high pitched that it gave my husband headaches for hours. I could turn my hearing aid off, but everyone else around Cade suffered from the screams. 

It got so bad that we stopped going anywhere in public. If I did, people would glare angrily at me. They would mutter and whisper. I felt like the most horrible mom in the world. My husband worked two jobs and went to college full time, and was rarely home. I felt so very alone living outside of town without a car most days. And it continued to get so bad that we even stopped going to church for about a year. Cade would pull my hair all the time, so one day I cut if all off until it was one inch long pixie cut.

No one wanted to be around Cade. EVER.

Every day I would get asked by family members and people: when is Cade going to be a normal kid? When is he going to smile? When is he going to be a happy cuddly baby (or toddler, or kid?) 

And everyday I would say: please, just be patient.

Cade rarely would go to his Daddy when he was little. No hugs, no playing...nothing. I was so sad about this.

Cade would never smile. EVER. See proof:


(this was my pixie cut for two years)

It has been said many times by others that if I was not Cade's mother, he would have been dead as a baby. Someone would have snapped one day and put an end to the madness that was Cade Powell.

I tried everything in the book. I went to doctors. I tried all kinds of advice. Then one day when Cade was two years old, I decided to create outlets for Cade to get mad at things and just supervise him: 

I gave him lots of pillows: Cade would beat and kick the crap out of them.
I put him in a mud pile: He beat the crap out of the mud and threw the rocks.
I gave him paint. Outside. He threw it around all over the place and none of it landed on paper.
I gave him punch-ball balloons. I made balloons for him to pop over and over.
I gave him a Hulk Bop-It thing, and he beat the crap out of it until it popped two weeks later.

And at bedtime he wanted his room cold, the fan on high speed, and wrapped securely with about three blankets and three pillows. (he still does this today at age 14)
He if needed cuddle time, it was in a specific rocking chair and he would scream and cry some more.
If he got hurt while playing, he would get mad and scream, and not want any TLC.

I could on and on with this list until it is 15 pages long.


By this time Cade was three years old, and I was worn out. And I still had another little boy would was super smart and demanding of my time, and I was home preschooling him and giving him math and reading challenges.

Then one day, the heavens parted. Rainbows shined. The angels sang. 
My patience and perseverance paid off:

Cade smiled.

I cried.


Month by month, it got a little better with Cade. Cade's very best buddy became his Dad. And I cried secretly while I watched their blossoming relationship.


When Cade's little sister and brother were born, he hugged them. Kissed them, and adored them. And he tried his very hardest not to be angry and screaming around them. 
And I would secretly cry in relief again.
(he would go outside for his mad moments or in another room)


I enrolled Cade in sports and he THRIVED:


As long as Cade is enrolled in sports year round and full time, it helped Cade to grow and thrive and be a happy child.

He still had his moments of screaming, mad, angry days. The real test was when I put Cade in school for the first time.

And I was so worried. So anxious. So nervous.

Would he make friends? Would he be nice? Would he thrive and learn at school?


I went to my very first kindergarten parent teacher conference for Cade. I was a nervous wreck.


And the first thing Miss Daniels said to me was:

"Cade is such an angel."

(disbelief and speechless)

Me: "You don't have to lie to me to make me feel better. You can tell me the truth. I have dealt with things with that boy more than any other parent I know."

Miss Daniels: (perplexed) "I am not kidding. He is one of my favorite students. He is kind, helpful, and always smiling. I just adore him."

Here is Cade at kindergarten:


I went home after the PTC and cried in relief.

Year after year it got better and better for Cade.
He stopped being angry and screaming.

He smiled all the time. He enjoyed life.

Here is Cade at 14 years and 3 months:


Here is Cade recently over the summer:


And here is Cade in November 2013. He was responsible for the very last play at 21-20 on defense. He was responsible for sacking the QB to prevent a score. The crowds were roaring and stamping in the bleachers screaming: DEFENSE!! After a nailbiting 30 minutes in defense mode, Cade helped bring the Ravens to victory.

And when it was all over, Cade's football team ran to the fence lines holding up their helmets to the crowds in celebration in front of the bleachers.

And Cade was yards away off to the sidelines, giving his Dad a hug:


And I cried again.


Happy Birthday Cade. 15 years old today. 

You have pushed and challenged me as a parent more than anything else I had to overcome and I have met those challenges. 

In return I have pushed and challenged you over the years as a child and you have thrived  in school with straight A's every year, thrived at church, at home, and in your community. And have done very well in sports. 

And most important, you thrived as a person to the point where everyone wants to be around you.

Just keep smiling.

Saturday, September 14, 2013

Warts Begone!

Hi all!

This is a post on getting rid of warts.

If you have NO intention of being CONSISTENT, then log off right now, this post on getting rid of warts will not help you if you are not consistent.

If you and/or your child has the tendency to be whiny and cannot handle some tough love over the SMELL of vinegar. Again, log off, and look elsewhere.

Okay now that we got that out of the way, are you ready to get rid of your WARTS?

First off, I am a person that uses natural home remedies and essential oils (EO) for many skin conditions and illnesses, and they have all worked for me. The EO process was not working for my child who had warts spreading aggressively all over, and once I treated a wart, two or three more popped up nearby the old wart site. Once it started getting on my child's face to the point where it looked like staph around his mouth, I started researching the internet for hours to find something that would work FAST.

WARTS BEGONE Method:

First of all these are your tools:

cotton balls
masking or duct tape
Organic Apple Cider Vinegar (Bragg's)


Apple Cider Vinegar:

I cannot stress enough that you get the right kind of vinegar. It needs to have the "mother" in it, which is a word used around the internet describing the brown floating sludge things in the apple cider vinegar. These brown floaty things are LIVE ENZYMES from natural apples. They are what help with fighting the warts.

The white vinegar and regular apple cider vinegar like Hienz is processed and "dead." They are okay for cleaning the house, or in your laundry, but not okay for cooking with food and using as home health care.

The most common OACV (Organic Apple Cider Vinegar) is Bragg's. They are usually found in supermarkets in the organic section aisles. They are also available at natural food stores or online. Some natural food stores have different brands besides Braggs, and those work too, if they have the "mother" in them, you can see the brown sludge on the bottom. READ the labels to be sure you are getting the right stuff.


Masking or Duct Tape:

Either is fine. Use common sense on sensitivity of skin. Masking tape pulls off easier, especially in areas with hair on the skin.

What to do:

1. Get cottonball
2. Put some OACV on it. I just put it on the mouth of the bottle and tip it over once, and put the bottle down.
3. Apply to wart
4. Cover with tape. A BIG piece of tape is best. In fact, cover it all up so no air gets to it.
5. Go to bed.
6. Repeat 3 to 7 more days.

Got that so far? This is a NIGHT TIME adventure. Its pretty smelly, so you will want to do this at night where the OACV can sit on the skin for 8 hours while sleeping.

Do this for 3 to 7 days WITHOUT FAIL. Do not skip a day. Sometimes it will sting because the wart area is now a little raw. This is GOOD. Some warts only need 3 to 4 days of this, some need more. Another option is to cut down the cottonball to a smaller size for smaller warts. The good skin around the wart can be covered with Vaseline if you are one of those super sensitive skin types when using the OACV method.

The first day the skin turns whitish, then it turns red and starts scabbing up, swelling, and bleeding. Then it looks gross and even bigger. Don't freak out! This is NORMAL. The WART is DYING!! It will continue to flake off as dead skin over a week or so and heal with new skin. Use common sense on yourself and your children on how sensitive the skin is. Maybe you will only need 2 days, and not the only 7 days to kill a wart.

Meanwhile as the skin is trying to scab over and heal where is wart is, continue to swipe OACV with cottonball on the treated wart one time before bedtime for about another week and throw the cottonball away. (I usually flush it down the toilet so I don't have smells building up in the trash can) In the morning wash off the treated area so you won't smell like stinky feet or socks for the rest of the day as my son learned the hard way at school with his peers pinching their noses.

Be patient! Keep wiping at it at night as described above as it is healing. During the day, put a small dab of organic cold pressed coconut oil on it to help your new skin to grow. Keep it exposed to air  (except during sports or high contact activities, and cover with a bandaid) Eventually the treated wart scabs will fade away. If its a deep old wart, especially in clusters, then expect a small light scar or very light crater which will fade away over the months. If its a newer wart, it fades away as if there was never a wart there.
By now the wart on top the skin is dead, you should have healed or healing skin by now.

Okay, now that you have been treating the wart on the outside, let's talk about the inside:

Warts are like stubborn soldiers in a tank. They will hang on if they can because of the wart roots inside the body covered with layers of hard skin. After a wart has been treated and the dead hard wart skin is off, and the skin is on its way to healing, a good way to make sure the wart roots are penetrated and completely killed off is to apply one drop of lavender essential oil neat which will sink into the skin and kill off the virus inside the skin a few times a day for about a week. You can do this along with the coconut oil. (NOT lavender fragrance or perfume, the real lavender essential oil). You can also use oregano or tea tree essential oils, diluted 1 drop EO to 1 drop olive or coconut oil. Lavender EO is more gentle for the kids. I personally can handle the oregano EO, its a "hot oil".

Another "inside the body" trick is to take magnesium and Vitamin A. Our modern diets are processed. Most of us don't really get the high quality vitamins and minerals. We kill them off often with our high heat cooking and so forth, or eating processed food. I have been researching and using magnesium oil with great results, there are tons of sites that boast on the health benefits of magnesium oil applied to the skin, and they have worked for me for what I used them for. The best kinds are the ones that are applied to the skin, as it sinks into the skin and enters the bloodstream directly, and not having to go through the stomach acid by pill forms. After about 30 minutes, the salt part on the skin can be washed away. (Note: it stings when used on raw skin because salt stings raw skins or wounds, it can sting the warts in various stages of healing, use common sense on using for young children)

Here is what I use:


You can also take high quality magnesium pills and vitamin A in pill form, and take them daily for weeks. That is WEEKS. Not two or seven days, then quit. The magnesium oil is not necessary, the pills can be used. However, sometimes you will have a stubborn wart. For little kids I recommend finding the proper vitamins for their age and body weight, and making sure the magnesium and vitamin A is close to 100% in daily value. My two tweens did fine with the adult dose of magnesium and vitamin A by oral methods. The moment I started them on their vitamins and minerals faithfully, the warts disappeared even faster. I have been able to compare with warts being treated with OACV only and warts being treated with OACV along with magnesium and vitamin A, and the second method was way faster.

My son Mr M had various kinds of warts all over, in various stages of spreading/sizes/types. He had a lot of cluster warts with thick skin, and flat spreading red warts. So I had to use the magnesium oil spray on some of the warts along with the OACV method. Some warts were small and newer and disappeared fast thru the OACV method alone.

My daughter had a tree wart on her foot between her toes, and I had to be more agressive with that one. After the OACV treatment in one night alone, the wart skin was dead the next day in a gross brown color that was wet, and it was able to be dug out with tweezers easily that didn't hurt. It left raw skin though, which is what I expected from a big deep tree wart being removed. The raw skin was treated during the healing process with organic cold pressed coconut oil and lavender EO, and sometimes clove EO to be sure any fungal material was completely dead and help grow new skin. The dead skin had to be cleared away for a few days several times, so at first it looked like an infection when in fact in was greenish dying skin in several layers from the deep wart. After three weeks it is completely healed with new skin.

Another tip is to work in sections if there are a lot of warts. I treated my son's face first. Then I did his hands. Then his knees and elbows. He has a couple more left on his feet to treat, then we will be all done. There were so many warts on one of my son's hands that I put a surgical glove with some OACV in it over my son's hand and taped it closed one night. Every now and then I have my kids put a 1/4 of a  cup of OACV in their bath water to be sure to keep treating all the skin areas so we can be sure those skin viruses are killed off. The side benefit is that their skin is getting softer.

Okay, now are you ready to try this method for yourself? Check it out and give it a try. Then leave a comment if it worked for you, or not, and why.

(PS: I found sites where it works on moles too, with pictures to prove it)

Monday, February 4, 2013

Heather: February 2013 Decorating!

Yeah! My favorite colors get to come into my decorating theme this month: red and pink. The Valentine/Love Month theme is simpler this year compared to last year.

First I need to talk about the milkglass LAMP SHADE! The one I was looking for the last 2 years for that goes to an old 1940's working lamp. The lamp is on the right hand side, which is sitting on a vintage silver tray, and that is sitting on a basket weave thingy. (I like to decorate in layers using texture and different heights etc) This picture shows the vignette decorating I did for this month on my IKEA bookcase in my living room/studio downstairs. I have an old window in the center, an old cheese cloche with wadded up vintage McCall pattern pieces inside that is sitting on an old red enamelware plate, the words L-O-V-E in front of it (a gift from a friend), two milkglass vases with two moss balls in them (from my spring deco stash) The frame on the left got a new craft project inserted. More on that later in this same post with a picture:


Here is the lamp in closer detail. I took it apart months ago and spray painted the faded brass parts aqua, and put it back together again. The white glass is hobnail milkglass, which is my favorite milkglass pattern to collect. Here is the shade that took MONTHS to find!! I love it! 


A closer look at the LOVE letters:


 Now here is where I do the "SHOP MY HOUSE" theme. I move things around my house a lot and give each area a whole new look using my favorite things:

I took the vintage blue Bell jars that I collect from the vintage hoosier hutch I have in my kitchen, and moved it to the top of the piano. It looked kind of boring just sitting there. So I added two pieces of wood of two different unfinished projects that were spray painted pink (bubble gum and ballerina) Then I took off the old zinc Bell jar lids and put them on each side of the jar display. (I FORGOT to do this part and take a picture of it, but the jars are going to get sprigs of rosemary from my garden outside, and keep them there till March, minus the pink wood base though) Now do you notice two more "lamps"? Those are the other two milkglass shades I found along with the one that went with my lamp. After months of looking, there is no way I was going to leave them there at Goodwill, in case I want to rescue another 1940s milkglass lamp, OR I could convert into some other design with more milkglass pieces and E-6000 glue. Okay, moving on with the two "lamps": I took two candlesticks that I had for about 3 years (spray painted makeovers from Goodwill) and taped the two milkglass shades over the candlesticks. Since I like to decorate in layers: I added two milkglass plates on them. I am thinking of sprinkling some conversation hearts candies there..eventually. Now the finale: the "HUG ME" wood blocks. A good friend of mine went though her craft stash and gave them to me, and they included a lot of cute letter wood blocks. Some of the stash went to the preschool class I teach in my home, and some went into current and future decorating projects. (I already took out JOY wood blocks for December, and LUCKY for March decorating)


Here is a vignette (one of many) at my vintage hoosier hutch in the kitchen: I have several vintage cheese cloches around my house. I move them around alot and put different things in them every month. I used only what I had I had. No shopping for supplies. The cast iron heart muffin thing I found a few years ago, I bring it out to the forefront in February (other months I use it as a stand to hold up a picture frame) I set out two heart trays I had for a few years: "true love" stamped silver tray, and an old wood heart I sprayed painted:


Several of my milkglass collection pieces got conversation heart candies in them. These candies have been in this house for aobut 4 years. My kids know by now NOT to eat any candies that I use to decorate the house with, because I re-use them every year:


One of my favorite pieces, a vintage gumball machine, gets decorated every month using what I have on hand for the theme of the month. The bigger heart used to be a garden stake, and it broke off at the base. Its perfect sitting inside my gumball machine. The other heart is a leftover from an old project as I had one heart too many:


This wire worded frame is a project I made last year. Its perfect sitting on the cupid apothecary in the foyer with a few simple touches. I still need to add some conversation heart candies in a few of the jars:


This is a board in the foyer above a bedroom (used to be an office) Every month some kind of banner I make will go there. This banner was made two years ago with wooded hearts I found at a thrift store. I modpodged some papers to them, and glued it to a burlap ribbon (that was saved from a gift that was wrapped with that. Like I said many times before, I don't shop for supplies, I use what I have on hand): 


This is a vintage doily I found years ago at a thrift store, and I have two of them. I love the sweet colors and details (cream, red, and pink) This is a work in progress for decorating this area. I am still thinking of what to do to decorate inside my empty wooden frame in the foyer. (a picture after this will show you what I mean, decorating within an empty frame) I will send an update later:


(here is what I mean, decorating inside my empty frame on the foyer wall):


Never can have enough printables. There are so many free ones to choose from on pininterest and the internet. My hallway by the foyer has 3 frames with pictures. Once in a while I will insert a fun printable inside the frames. This month for Love Month got these two cool ones I found. The LOVE one with the heart was originally gray and mustard yellow, which I didn't like, but I loved the design. I used my photoshop and used the HUE slider button to change the color until it turned red and saved it as a different picture.


An oldie but goodie...these hearts that are pinned to my canvas curtain in the kitchen/dining room window. I pin some cute stuff up on my canvas curtains in the kitchen most months, using the decorated theme for the month. These hearts were made years old from fabric recycled from a broken lamp shade. These hearts get placed in a different location every year. They add a fun whimsy in the kitchen:


Okay, I DID craft/create something this month for February. I cut a 4by6 piece of thin cardboard (I often use cereal boxes that get recycled) Cut a piece of 4by6 red burlap from my fabric stash. Glued on buttons from my button stash. And put it in this frame. (which is on the bookcase shelf in a vignette, see the first picture) This frame gets something new in it every month related to the theme decorating of the month. Sometimes it is a printable, sometimes a nice photo I took, sometimes something that I made. I like the simplicity of this project paired up with an ornate frame (a Goodwill find that I spray painted a few years ago):


I printed these circle labels last year, and forgot to use them. Now it is perfect displayed in my vintage frogs on my vintage Coco Cola wood crate that houses my acrylic paints by color in my living room/studio. The rest of the cute circles are tucked into different picture frames around the house in the edges between wood and glass:


Now, I have a lot more love month stuff  and "shop my house" themes I did put around the house in different rooms/locations. But I have a rule: if more time is spent blogging and uploading pictures about my crafts, than actually crafting...then what's the point??!!!

(I do have ONE more project to show my friends, I will upload that on Facebook real quickly as soon as I get a photo of it)


All right, I showed you my projects and decorating for this month. Now you gotta show me yours, or at least tell me about it!

Sunday, February 3, 2013

Farewell to January Decorating

I only put up two pictures for my January decorating. The theme was Winter Wonderland.

After Christmas is over, I usually keep all my silvers, whites, blues, and sparkly stuff out. And anything snowflake or snowman themed.

This is in my foyer. Its pretty simple. One of my favorite craft project I did for January is a makeover on  an old frame. Went I went to paint the frame, I was dismayed to discover it had no glass. I was going to put some cute printable in there. So I took the backboard which was made with MDF, and painted it white. Then I took some old chipboard letter stickers, and sprayed painted it aqua blue. Then I glued it on. I think it looks perfect sitting up on my apothecary (Frosty's apothecary: the jars holds buttons, fake snow etc) I tend to decorate in multi-layer styles. I plan to use the back of the MDF I painted, and do a Valentine or spring theme, so all I have to do is flip the backboard, and re-use the decorated frame for a different month:


This one is my absolute favorite! Back last Sept I put up this old frame on the wall, and I have been different fun stuff to decorate every month. For Winter Wonderland January theme, I put up my snowflake stuff from my Christmas decoration stash. The blue "snowflakes" are old wood potholders I almost discarded in the recycle bin or gave them away. I realized they would make great snowflakes, so I spray painted it aqua and put a bit of sparkles on them (Martha Stewart white and clear glitter). This picture does NOT do it justice. Yes, I realize the snowflakes within the frame is not completly centered, but I didn't want to make new nailholes, they were hung up on existing nails on the wall inside the frame:


The rest of the house got some cute and simple touches, and I loved it, and got compliments on it. I  take about a thousand pictures every year, so I opted to pick just a couple of projects on the blog for Jan 2013 decorating so I can spend more time creating and crafting and less time blogging about what I make every month.

What decorating did you do for January 2013?

Monday, October 15, 2012

Heather Thrifty Crafted: BOO sign

This project was so quick and easy, it literally only took me 15 minutes from start to finish.

I was inspired by this photo I saw a half hour ago while looking at inspirations from crafty blogs:


I already have a white frame with three photo spaces, and I have been decorating it each month for holiday themes. (see here for example of what I did in May and the inserts I used for July: http://tweedledo.blogspot.com/2012/05/makeover-for-triple-picture-frame.html)

I had an old 1973 dictionary with wonderful patina that I got from the thrift store for a $1 that I have been using many times for different projects. I used three pages of it to make the letters B-O-O.

Now here it is:


So easy, so quick, so chic...if you only have dictionary or scrapbook paper, and a printer and no other art/craft supplies, you can do this! (Also providing if you have a triple photo frame on hand)

I set my size on the Word Document for 4 x 6, and I used WordArt to put a font in for the letters B-O-O.

The fonts I used were: Carnivalee Freakshow, Dead Letter, and Cracked (I had them in my fontbook for awhile) You can use any font you wish.

Cost of project for me: FREE!

Have you made a Halloween sign of some sort? Please share and let me see! :o)

Saturday, October 13, 2012

Thrifty Craft: make banner from old doilies

I have a few vintage doilies, some my grandparents made, some I bought, and some I have no idea when and where or how they came into my house...

and then my mother ships me a box full of fall themed linens and tableclothes, and there were a lot of doilies.

I'm not really much of a doily person anymore, and don't use them around my house.

Then I got inspired by this:


I found the first three photos from blogs on the internet, I don't remember the links...


So of course I made my own. I love that I can move it around the house and hang it anywhere, and use it for any season.

Its currently in the hallway leading to the MPR full of fall time goodness and a few Halloween decorations:


Sunday, September 30, 2012

Aug Thrift Decorating: Beach Theme

Finally getting around to posting about the thrifty decorating I did for the month of August 2012.

The theme was Beach.

I shopped my house, moved things around, got out my stash of seashells, and painted some old cupboard doors with chalkboard paint to come up with a few things.

Then of course I forgot to take pictures, and I took a few on the day I started putting all the stuff away from the Beach theme.


Not beach related, per se. But its an old pantry door I painted, and I use chalk to make some sort of sign for the theme of the month. It was beach themed, then I erased it and added this for Labor Day weekend:


Painted a piece of spare wood in the garage, and made a beach sign. I can change it up whenever I feel like it, or move the sign to somewhere else in the house:


I buy a lot of old jars from the thrift store, and I add different stuff in them every month. For the beach theme in August, I had a lot of them full of seashells:


More seashells in jars. Some in vintage blue bell jars. The turquoise ones are a rare find. The ones with the zinc lids are even harder and are more expensive to buy now. I have about 6 to 8 of the blue bell jars with zinc lids. They are so fun to decorate with things inside them:


I shopped my house for the bookcase mantel. I put an old window frame up, painted an old cupboard door with chalkboard paint, and made a beach sign, (and able to change and move it around throughout the year). The cheese cloch has some seashells in it:


This chalkboard has been there for months. I change it every month. I put up a birthday menu, party menu, cafe themes etc depending on my themed decorating for the month. Here is the beach one:


This was an old cupboard door painted white, and a blue star painted for the 4th of July month. I don't know where to put or store it right now, so I just covered it with  a beach theme scrap paper:


I collect white milkglass. I love to find them in pairs. I change them around and pair them up in fun ways often. The two compote dishes had seashells in them, forgot to do the picture before I put the shells away. I love the compote dishes here. I have two small and two medium ones. I thought it was fun to stack them like a tiered stand:


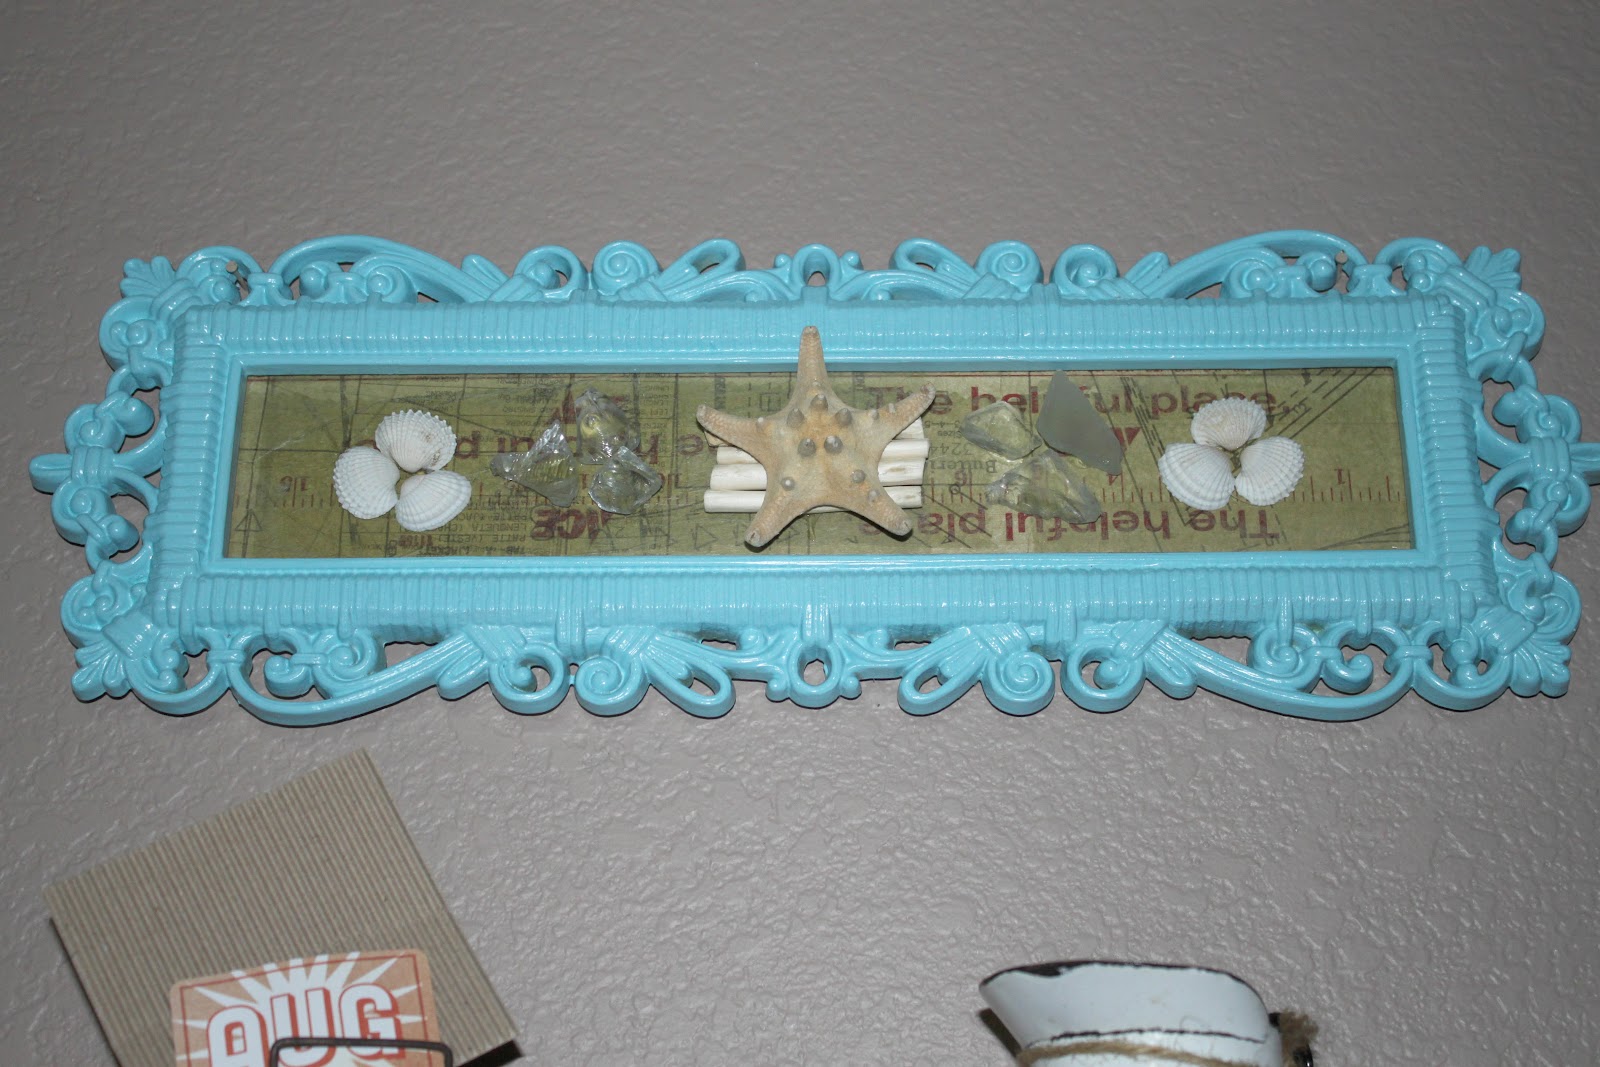
This scrolled frame used to be brown and its from the 70's. My mom had some oval frames and butterflies in this style (I found some vintage butterfly ones, more on that later for the Sept decorating) I change this frame color often and move it around. For Aug, I stapled together some spare thin pieces of wood to make the background, and modpodged on some vintage patterns paper, then glued on sea glass and seashells. I taped the artwork to the back of the frame so it can be removed and the frame used for other later projects:


Here is the apothecary I had up for years. I change it every month. The jars now have a few seashells and driftwood. Some of the jars just has crinkled paper cut up from old paper bags. The vintage thingie holds a scrap paper with the month of Aug in it. I love going through my stash of scrapbook embellishments, then I just put them back when I am done using it (or scrapped with it for another project):

Finally my song paper wreath thats above my piano. I change center of it every month. I have a magnet in the center, so it makes it easy for me to create a new center whenever I feel like it and glue a magnet on the back of it. The top piano mantel had cheese cloches with seashells, (which had been removed before pictures) The month of August of beach theme on my wreath:


A closer look:


A much closer look. Three seashells are glued onto brown coffee filters and the vintage patterns paper that I cut into a few circles:


That's pretty much it for Aug decorating. Sept decorating is all ready up. And of course its Oct 1st tomorrow, and its already time for Halloween decorating.

What themes do you use to decorate your house with in the summertime?